How to Turn Flat Lay Clothing into Professional Product Photos for Instagram Stores
Learn how to shoot simple flat lays on your phone and convert them into high-quality model photos for your online store.
 DevForge Studio
6 min read
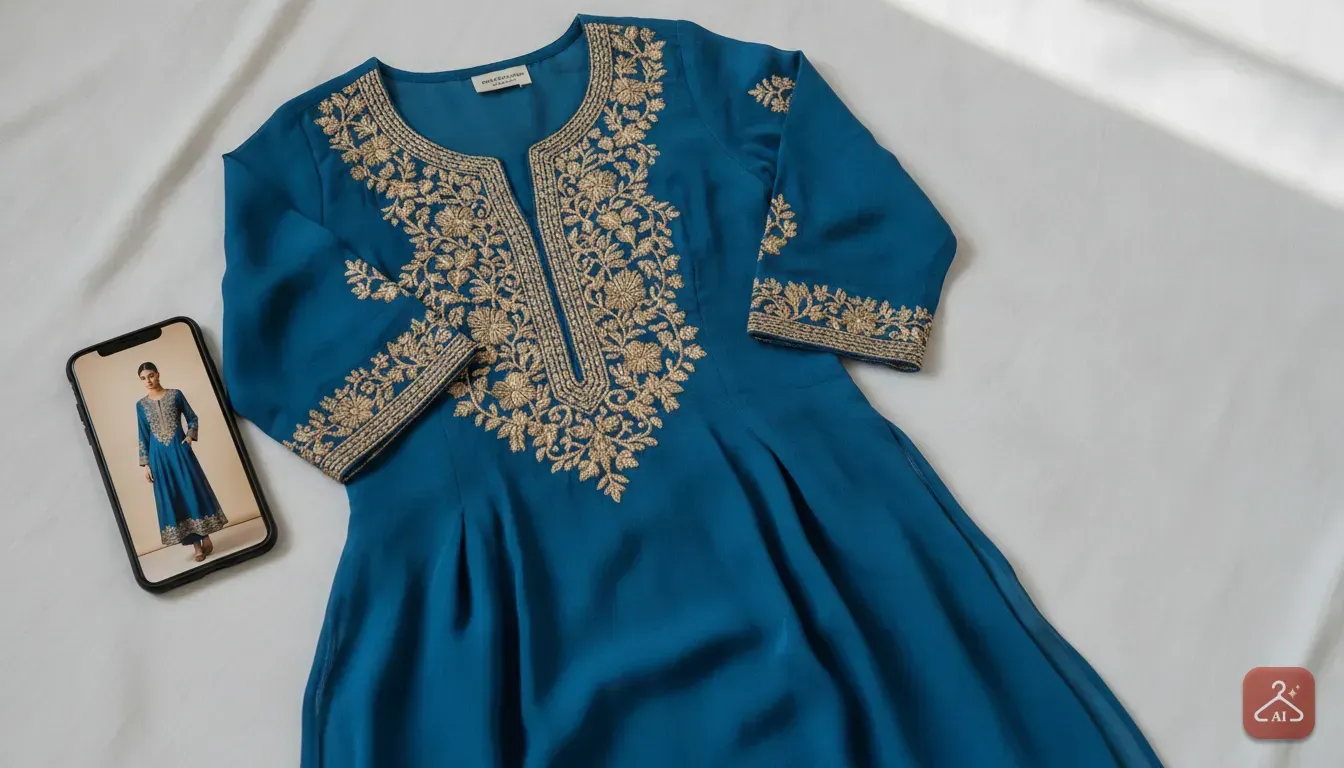
Running an Instagram store takes massive effort. Between sourcing garments and packing orders, photography usually becomes a rushed midnight job. You'll toss a kurti on the bed, snap a picture and post it, but buyers want to see how clothes fit on a real person before they pay.
You can fix this without renting a studio or hiring models. We'll show you exactly How to Turn Flat Lay Clothing into Professional Product Photos for Instagram Stores right from your phone. You'll learn our exact steps for getting catalogue photos that build trust and drive sales.
Why Flat Lays Need a Visual Upgrade
Flat lays are quick to shoot and do a great job showing fabric colours. But they completely fail to show the drape. When a buyer looks at a wrap dress on a bedsheet, they can't tell where the waistline hits or how the fabric flows.
Guessing leads to hesitation. They'll just close the app instead of messaging you to buy. If they do purchase, that guesswork often leads to returns because the fit wasn't right.
Putting your garments on a person gives much needed context. It immediately shows if sleeves are tight or loose. Answering these sizing questions visually saves you hours in direct messages and helps customers shop with confidence.
Step 1: Shoot a Clean Flat Lay First
A good final result always starts with a good original photo. If you upload a blurry picture of a crumpled dress, you'll just generate a blurry model wearing a crumpled dress. You have to give the software a clean starting point.
First, iron or steam the clothing. We notice wrinkles constantly confuse photo editing software. Make the garment look as neat as possible.
Second, turn off your yellow room lights and move next to a large window. Soft daylight shows the true colour of your fabric. Don't shoot in direct sunlight, because harsh shadows ruin the texture and change how colours look.
Next, pick a clean background like a white or light grey sheet. Pull it tight so there are no folds underneath. A busy background makes the extraction step much harder.
Finally, lay the garment out neatly to reflect its actual shape. If you're photographing a saree, pleat it nicely and fan out the pallu so the design shows. For a kurti, arrange the sleeves naturally.
Hold your phone directly above the clothes. Keep the lens parallel to the floor to avoid stretching the dress. A distorted camera angle will always result in a distorted final image.
Step 2: Extract the Outfit from the Background
Now you have a great photo on your camera roll. The next step is removing that bedsheet or floor from the image entirely. You only want the clothing itself.
Editing tools work best when they don't have to guess what belongs to the dress. Removing the background cleans up the file.
We use our own app Outfit Gen AI for this step. It has a specific Extract Outfit feature built exactly for this problem. You upload your flat lay, and it automatically cuts out the shadows and background.
This leaves you with a clean, isolated image of your garment. Save this file to your phone. It's the absolute key to getting a realistic model photo in the next step.
Step 3: Turn Your Flat Lay into an AI Model Photoshoot
This is where your basic product photo becomes a professional catalogue shot. You'll use that isolated clothing image to generate a realistic lifestyle picture.
Open the Model Photoshoot tool in Outfit Gen AI and upload the clean clothing image. Next, you'll need to select a model. This choice matters heavily for your Instagram store identity.
Buyers want to see people who look like them. If your target audience is young women in India buying ethnic wear, pick an Indian model. Matching the model directly to your customer base makes the photos much more relatable.
The app takes your garment and maps it onto the digital model. It understands the shape of the clothing and adjusts the drape so it looks natural on a human body.
In just a few seconds, you get an image that looks like a real studio session. You get the polish of a hired photographer without the massive cost.
Step 4: Fix the Lighting and Match Your Brand Vibe
Plain white backgrounds are standard for big online marketplaces, but Instagram is totally different. Your followers want a lifestyle vibe. They need to imagine themselves wearing the outfit in a nice setting.
You can use AI editing tools to change the background of your new model photo. Just don't choose anything too distracting. The focus must always remain on the clothes you sell.
If you sell a floral summer dress, try a sunny outdoor cafe. For a heavy lehenga, choose a softly lit festive room or a grand doorway.
You can simply describe the background you want in your own words. Matching the setting to the clothing helps sell the story of the outfit.
For more background ideas, check out our detailed guide on taking product photos for an online clothing store using AI. A great practical tip is to keep the background slightly out of focus. That blur makes the model and outfit pop out clearly on small phone screens.
Step 5: Upscale the Final Image for Instagram Sharpness
Instagram compresses images heavily when you upload them. If you start with a low quality photo, it'll look terrible by the time followers see it on their feed.
Online shoppers love to pinch and zoom. They want to check the embroidery of a kurti or the print on a t-shirt. If they zoom in on a blurry mess, they'll lose trust in your product quality.
Before you post, make the image as sharp as possible. Use the 4K Upscale feature in Outfit Gen AI. It takes just one tap.
The tool sharpens the edges, clears up the model's face and makes fabric textures crisp. A high resolution image signals to buyers that you run a serious, professional store.
Mistakes to Avoid When Generating Product Photos
Using these tools for clothing photography is easy. But there are a few common traps we see sellers fall into.
- Ignoring the original lighting: We mentioned this earlier, but it's critical. If your flat lay is dark and yellow, the software struggles to make the final photo look bright. Always start with good natural light.
- Overcomplicating the background: If you add fifty different props and bright colours, the clothing gets lost in visual noise. Keep backgrounds simple.
- Not checking the details: Always double check the final image before posting. Look closely at the sleeve edges and the model's hands. If you spot a tiny error, just generate the image again.
- Forgetting consistency: Try to use similar lighting and backgrounds across your posts. A consistent grid makes your brand look highly trustworthy.
Some sellers prefer using mannequins instead of flat lays. Mannequins show the shape immediately, giving you a slightly better starting point. If you own one, read our guide on turning mannequin pictures into AI model photoshoots to see which method suits your inventory.
Your Practical Next Step
Reading about new methods is good, but applying them actually grows your business. You don't need to reshoot your entire inventory today. Start small and test the results.
Pick three items from your store that get plenty of likes but not enough sales. Iron them well. Set up a clean white sheet near your biggest window tomorrow morning.
Take a neat flat lay photo of each item. Run them through the app to generate your professional model photos.
Post the flat lay and the new model photo on your Instagram stories as a before and after. Ask your followers which one they prefer. You'll quickly see how much more engagement a professional model photo brings to your store.
Frequently asked questions
Can I use AI to put my flat lay clothing on a model?
Yes, you can use AI tools to take a photo of clothes lying flat and map them onto a digital model. This gives you a realistic catalogue image without hiring a photographer.
What is the best way to light a flat lay photo?
Set up your flat lay near a large window to use soft, natural light. Avoid harsh direct sunlight and switch off yellow indoor bulbs to keep the fabric colours accurate.
Will customers know it is an AI model?
High quality AI generation looks very realistic, especially when you start with a clean, well-lit photo. However, you should always ensure the final image accurately represents the true fit and colour of your product.

Try it yourself
Outfit Gen AI
See yourself in any outfit before you buy it.